Body
Contents:
UD Remote Computer Labs is a virtual computer lab desktop environment that can be accessed through a web-based portal or through your Canvas course if enabled by your instructor. For detailed help documentation, visit the
Apporto Help Center.
Accessing UD Remote Computer Labs through your Canvas Courses
This step must be done for each Canvas course you want to connect to Apporto Remote Labs. You can only complete these steps if your instructor has enabled UD Remote Computer Labs in your CANVAS course
- Log in to CANVAS course, The Dashboard will show your Course(s).
- Click on the course you are trying to access.
- The “HOME” page for that course will appears. There will also be a number of menu items for that specific course. Click on the UD Remote Lab option in your course navigation menu. You can then choose to connect to a UD Remote Lab.
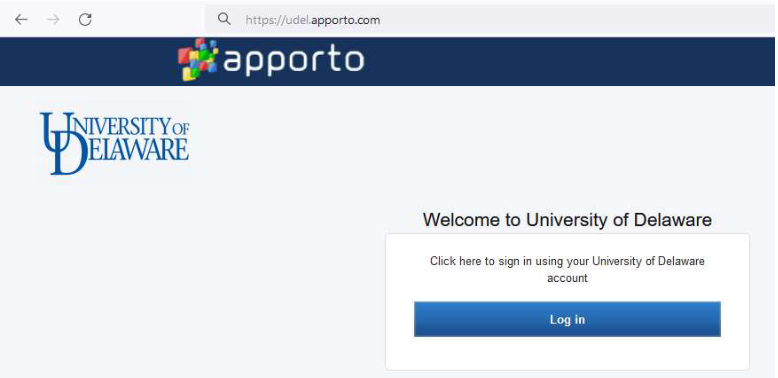
- After connecting to the UD Remote Lab, click Log In and enter your UD credentials.
Note: Log in should only appear on your first time using UD Remote Lab
MAC USERS: WebGL is required. To enable it on Chrome/Mac, set the "Use graphics acceleration when available" setting to "ON".
Contents
Launching UD Remote Computer Labs
- Once logged in, you will enter the Apporto App Store.
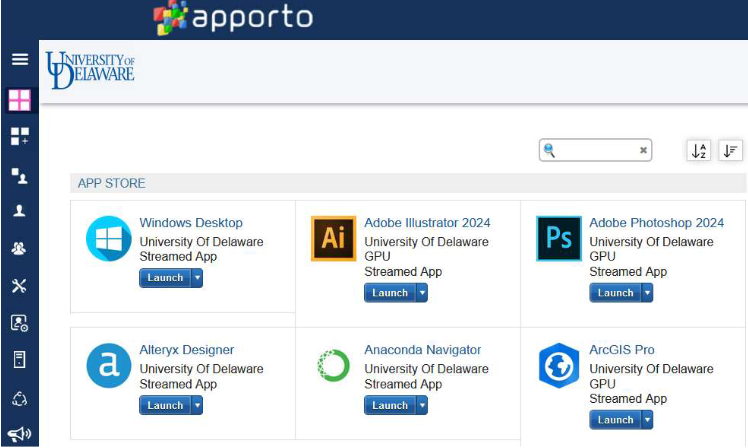
- Find the app you wish to use, for example the Windows Standard Desktop, and click the Launch button.
Note: Your screen may have fewer options based on your courses or major.
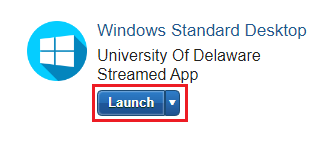
The app launches in a new browser tab. You may be prompted to share your Camera and Microphone. You can choose to allow or block, based on your preference.
For additional usage information, refer to the Apporto guide:
Accessing your work in the Apporto Cloud Mounter
Saving your work to the cloud in Google Drive or Microsoft OneDrive ensures that you will have access to it throughout your Degree Program. It also makes it easier to connect your Google or Microsoft OneDrive to other applications like Apporto, to be able to turn in your assignments directly to the Professor or Course.
The Apporto Cloud Mounter installed within the UD Remote Computer Labs enables users to directly access their Google Drive or Microsoft OneDrive. The Cloud Mounter seamlessly maps your cloud storage as a network drive, making it easier to get to all of your data.
For more information on your University of Delaware Google Drive:
For more information on your University of Delaware Microsoft OneDrive:
Connect to Google Drive
- Locate and double-click the Cloud Mounter icon on the UD Remote Computer Labs.
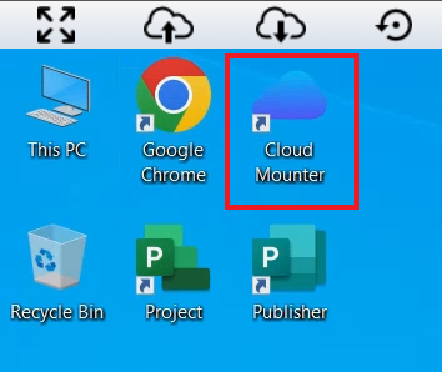
- Cloud Mounter will launch and prompt you to Start a New Connection.
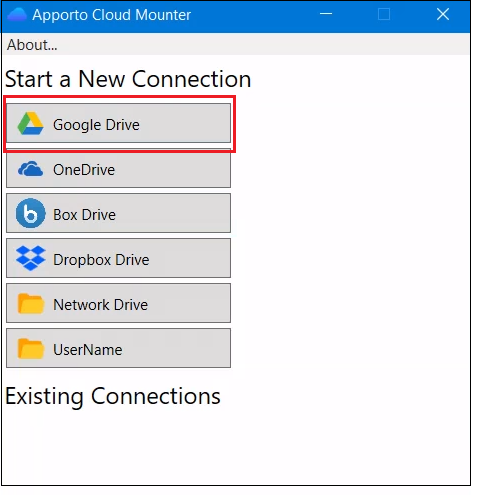
Click Google Drive.
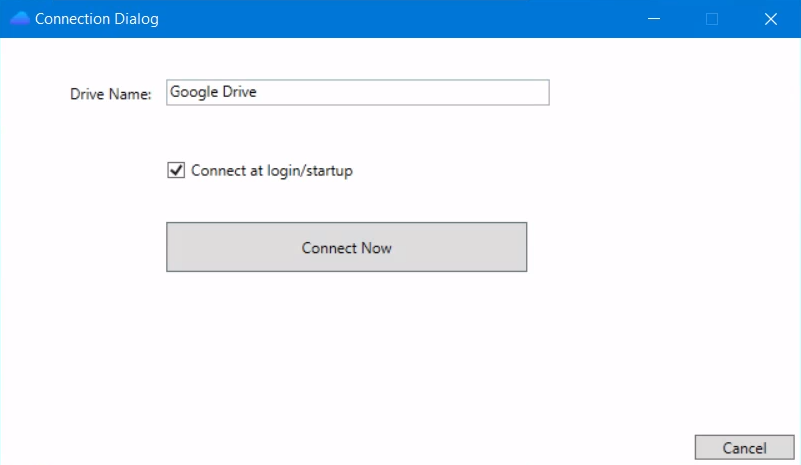
- In the Connection Dialog window, ensure that Connect at login/start is checked and click “Connect Now”.
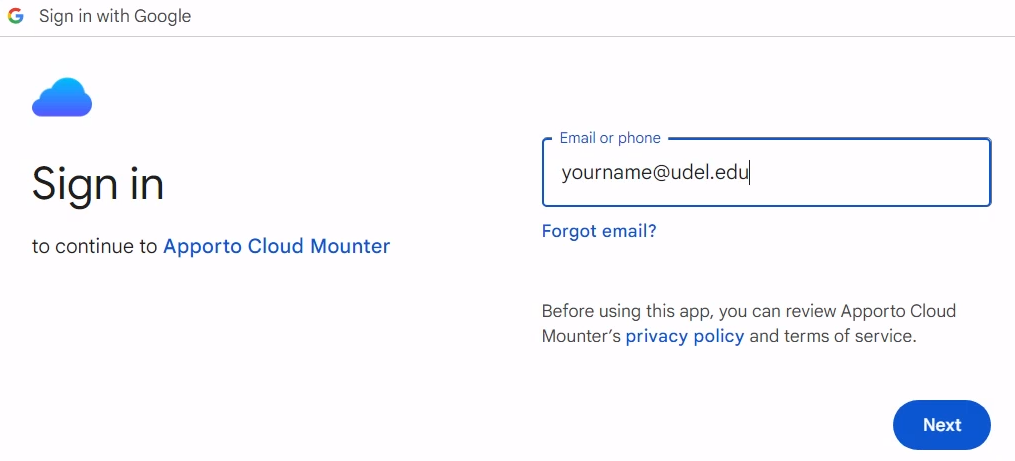
- When prompted to sign in, use your full UD email address and click Next.
When prompted by CAS, enter your UD credentials.
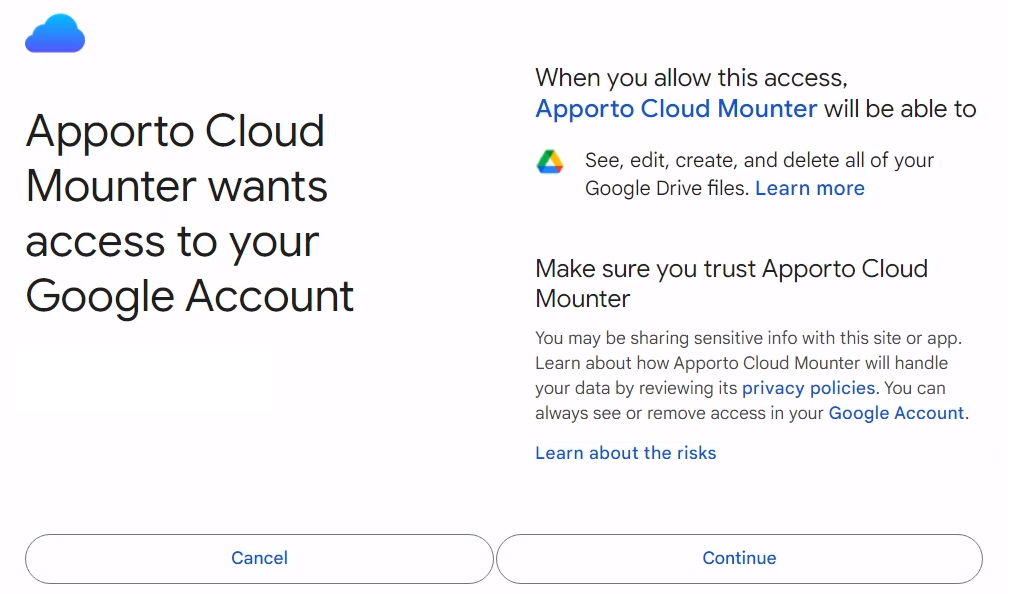
- Click Continue to authorize Apporto Cloud Monitor.
Contents
Using Google Drive in UD Remote Computer Labs
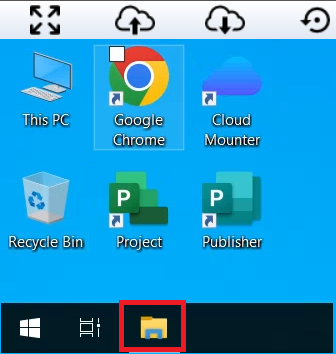
- When you log in to a lab computer, the Cloud Monitor will automatically connect to your Google Drive. You can find your Google Drive using the Files icon at the bottom left of the UD Remote Lab.
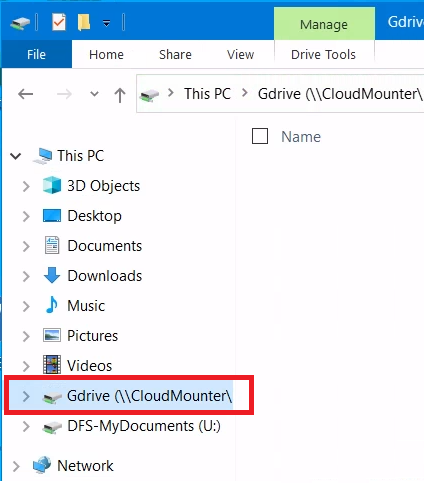
- The Cloud Mounter will automatically map your Google Drive to the Cloud Mounter Gdrive location which will be listed on the left side of the window.
For additional usage information, refer to the Apporto guides:
Connect to OneDrive
- Locate and double-click the Cloud Mounter icon on the UD Remote Lab.

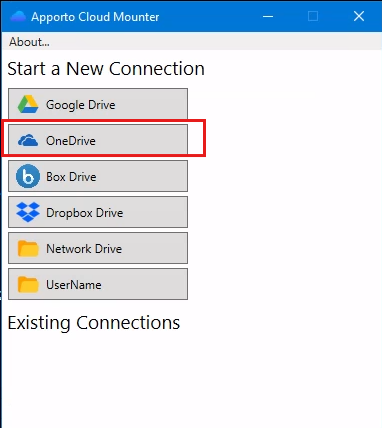
- Apporto Cloud Mounter will launch and prompt you to Start a New Connection.
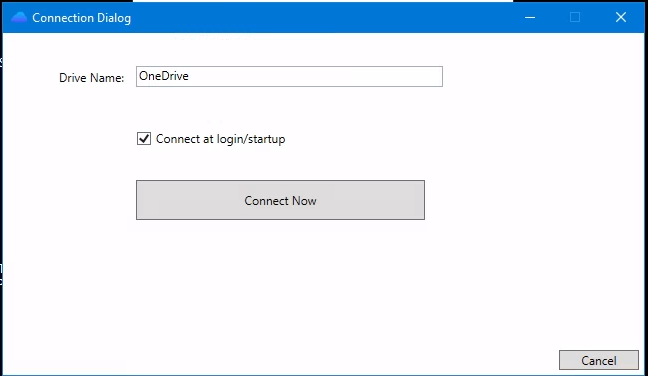
- In the Connection Dialog window, ensure that Connect at login/start is checked and click Connect Now.
- When prompted to sign in, use your full UD email address and click Next.
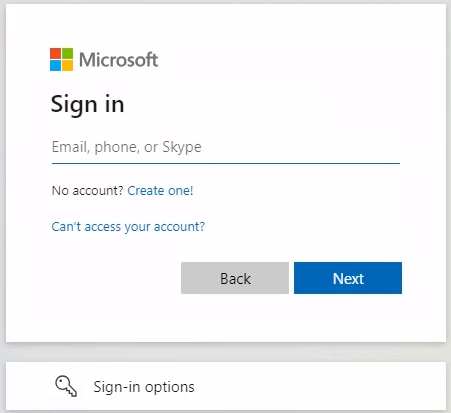
- If prompted to choose between "Work or School account" and "Personal account", choose the Work or School account option.

- The confirm your password entry screen (includes UD branding) opens.
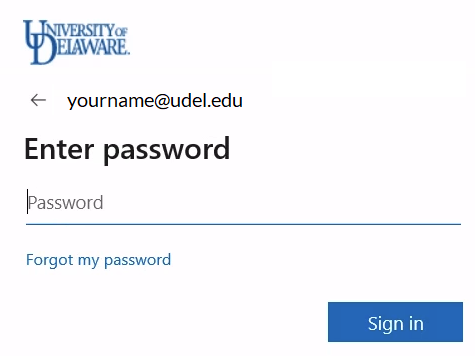
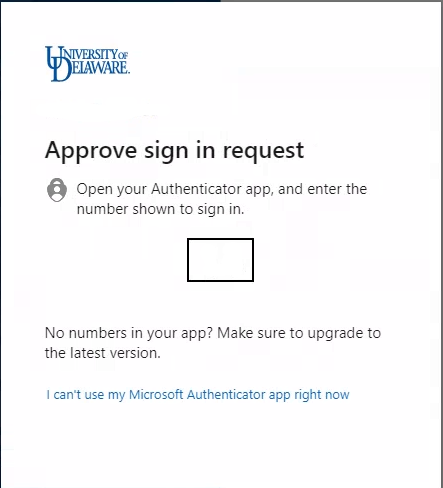
- When prompted, provide your Microsoft MFA code [Multi-Factor Authentication] to verify your account.
Contents
Using OneDrive in UD Remote Computer Labs
- When you login to a lab computer, the Cloud Monitor will automatically connect to your OneDrive. You can find your OneDrive using the “Files” icon at the bottom left of the UD Remote Lab.

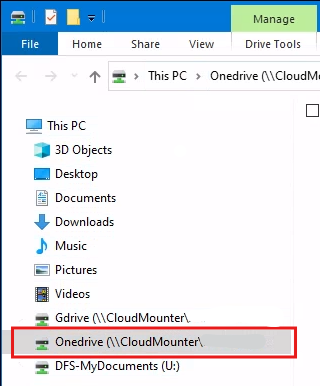
- The Cloud Mounter will automatically map your OneDrive to the Cloud Mounter Onedrive location which will be listed on the left side of the window.
For additional usage information, refer to the Apporto guides:
Contents
Apporto and Office365
If you wish to use any Office365 apps like Excel, Word or PowerPoint, you can use them from a UD Remote Computer Labs session.
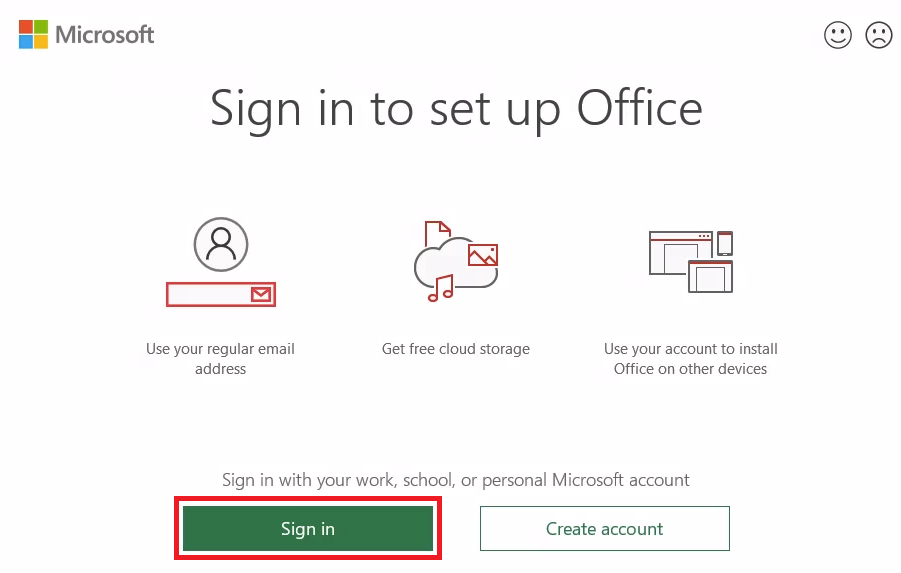
- Office365 requires a sign-in to acquire a license associated with your user account when launching a Microsoft Office product. Click Sign in.
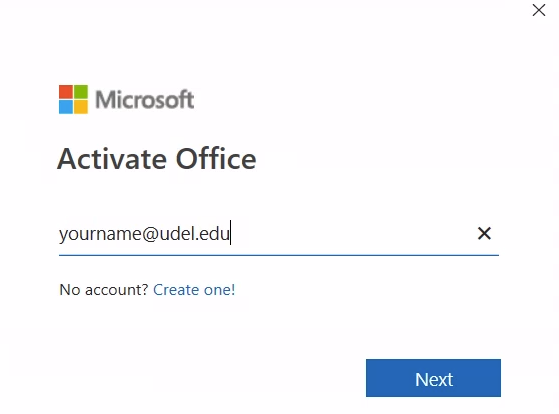
- When prompted to sign in, use your full UD email address and click Next.
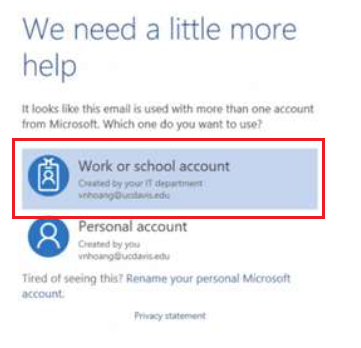
- If prompted to choose between "Work or school account" and "Personal account", choose the Work or School account option.
- The confirm your password entry screen (includes UD branding) opens.

- If prompted, provide your Microsoft MFA code [Multi-Factor Authentication] to verify your account.

If you notice the phone number associated with your account is not valid, please contact askit@udel.edu or call 302-831-6000 to get it updated.
Once successfully signed in, all Office features will be enabled. You may need to restart the Office app for the license activation to take effect.
Contents
Using UD Remote Computer Labs in Canvas
Additional features are enabled when you access UD Remote Computer Labs from within your Canvas course using the UD Remote Lab course navigation link, including the ability to submit files directly to a Canvas assignment.
Student Toolbar (showing the "Assignment" Icon as highlighted)

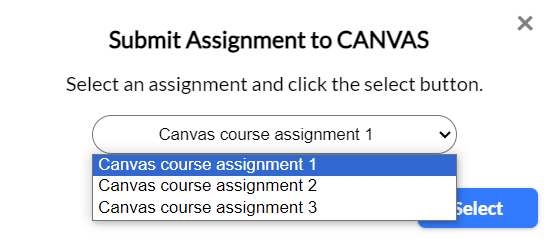
To submit assignments, you must launch the UD Remote Lab from the Canvas course, which adds you to the group associated with that course. When submitting an assignment, choose the Canvas assignment from the drop-down list and click Select to submit.
For additional usage information, refer to the Apporto guides,
Logging Out
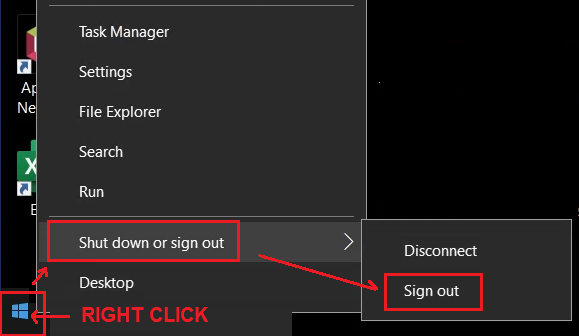
When finished using the UD Remote Computer Labs, sign out of your session:
- Right-click on the Start menu.
- Click the Shut down or sign out option.
- Click Sign out.
Contents
Additional Resources
UD Assistance
For issues and questions that cannot be resolved with Apporto resources, concerning Apporto, contact the UDIT Support Center @ (302) 831-6000.
Contents